First, you will need to register your website as an Application on the App Console.
-
In the App Console register a new application by clicking the Register new Application button. The Register Your Application form will appear.
Note: You will be redirected to Seller Central, which handles application registration for Login with Amazon. If this is your first time using Seller Central, you will be asked to setup a Seller Central account.
-
In the application details page, add basic details about your product. These details will be used on your website and mobile apps (if applicable).
- Name Shown to Users. This is the name displayed on the consent screen when the users agree to share the information with your application. This name applies to Android, iOS, and website versions of your application.
- Description. A description of your application for Login with Amazon users.
- Privacy Notice URL. The Privacy URL is the location of your company or application's privacy policy. It is also displayed on the consent screen. This link is displayed to users when they first login to your application (for example, http://www.example.com/privacy.html).
- Logo Image File. This logo is displayed on the sign-in and consent screen when users log into your website or mobile app.
The logo will be automatically resized to 50 x150 pixels. The following formats are accepted: PNG, JPEG, GIF.
-
When you are finished, click Save to save your changes. Your sample registration should look similar to this:


-
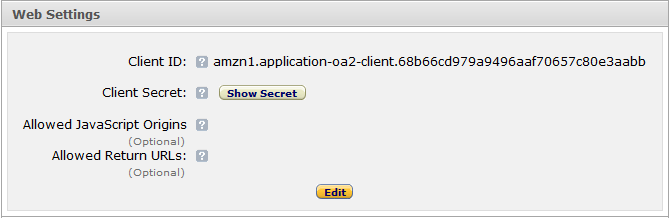
From the Application screen, click Web Settings. You will automatically be assigned values for Client ID and Client Secret. The client ID identifies your website, and the client secret is used in some circumstances to verify your website is authentic. The client secret, like a password, is confidential. To view the client secret, click Show Secret. You should take note of your Client ID as you'll need it again later on.
-
To add Allowed JavaScript Origins or Allowed Return URLs to your application, click Edit.
-
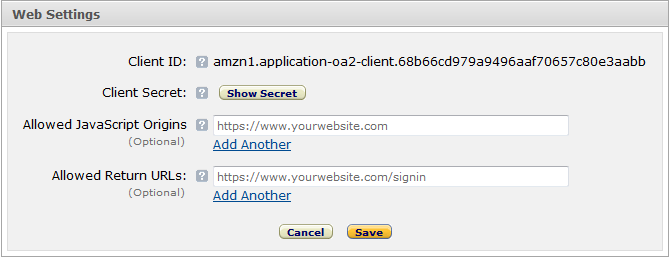
You should add your domain as an Allowed JavaScript Origin.
-
You should add the root of your osCommerce install followed by /loginwithamazon.php as your Allowed Return URL. For example, if your osCommerce store is installed at https://www.example.com/store you'd enter: https://www.example.com/store/loginwithamazon.php
-
-
Click Save
If you have a custom process, these instructions may need to be modified slightly to fit your deployment process.
- Create a backup.
- Download the plugin.
- Extract the zip file.
- Copy the contents of the zip file to the root of your osCommerce install (via FTP or however you typically upload files to your site).
- Test as desired.
- Upload the changes to your live site.
-
Log in to your osCommerce control panel.
-
On the left hand navigation select Header Tags from the Modules sub-menu.
-
Click the Install Module button.
-
Select Login With Amazon in the list of modules then click Install Module.
-
Select Edit on the right of the page.
-
Choose Enable, enter your Amazon Client ID and click Save.
-
Verify that the Login With Amazon button is showing on the login and register pages.


